Pages

Friday, May 2, 2014

Etsy shop and a new baby quilt!

I've opened an Etsy shop to start selling some quilts. I have a few baby blankie (Blankie and a Backup) sets up there right now, but there will be quilts coming soon!

My shop is called Bent Needle Quilts and I'm planning on using that name for craft fairs, also.

Check it out!

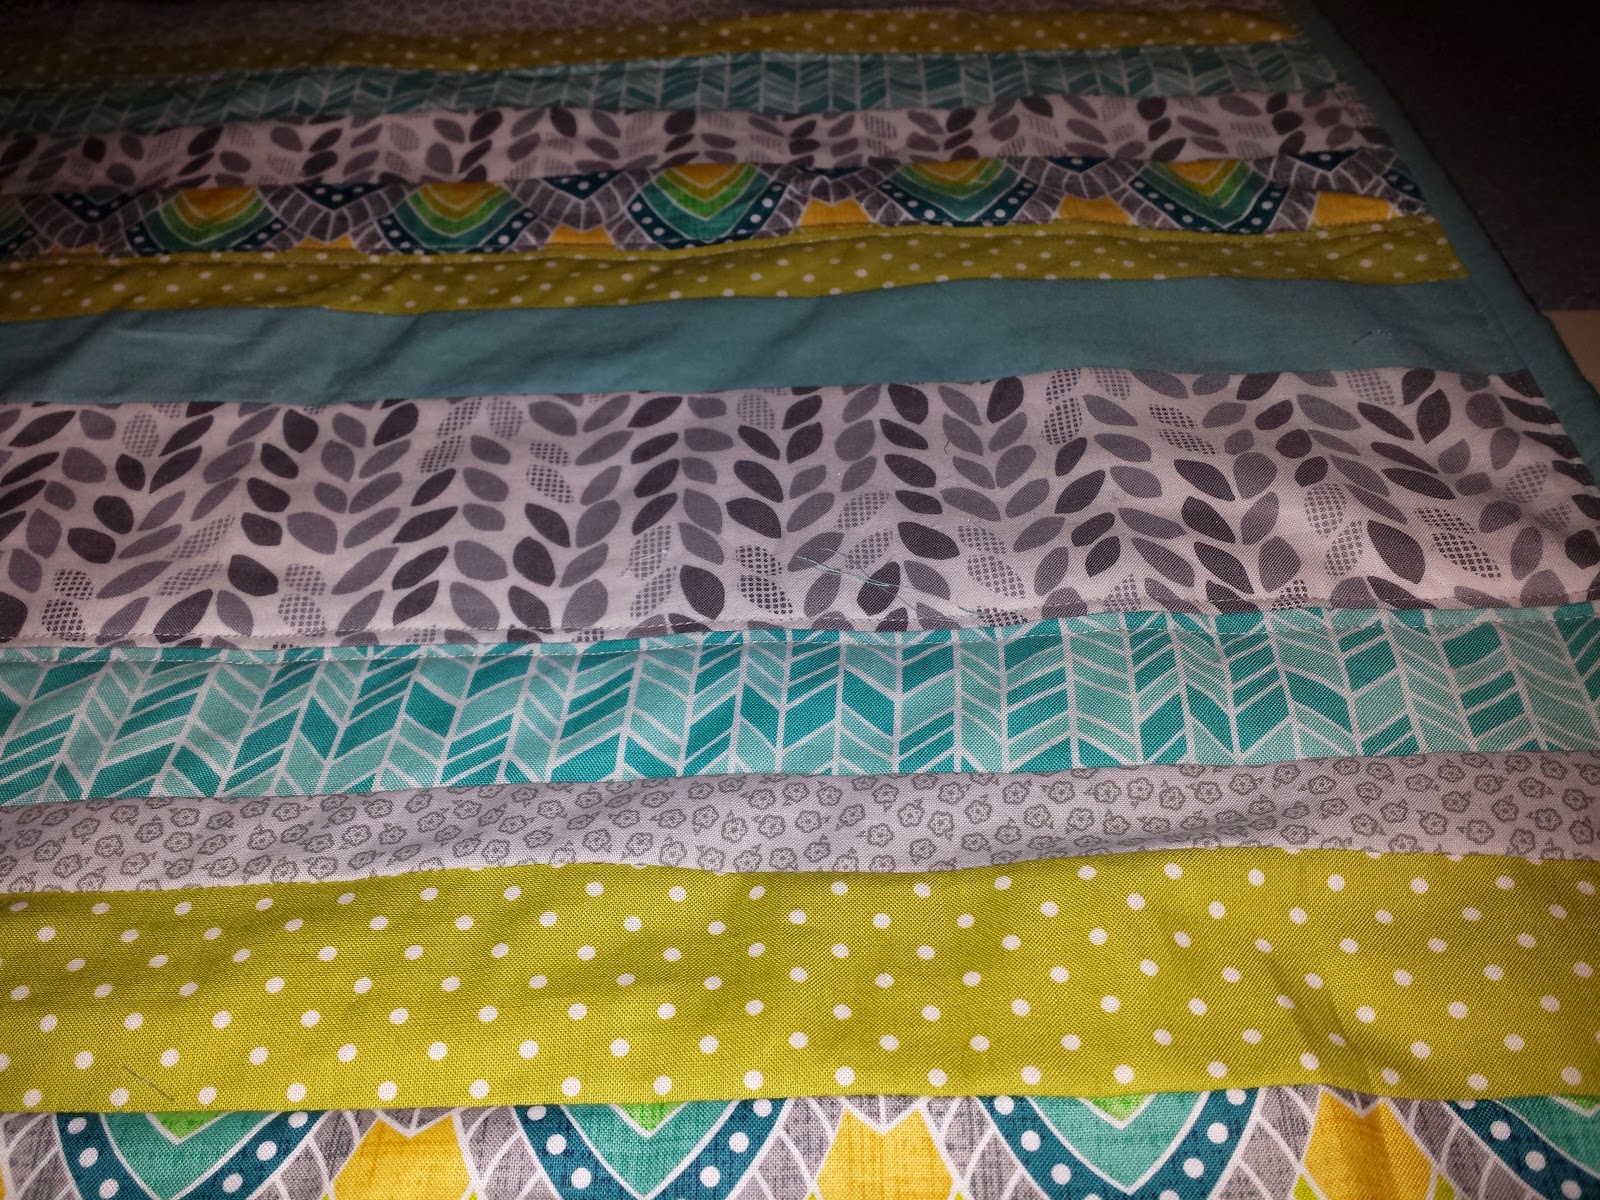
And here's the quilt that I plan on listing soon. It's a crib-sized baby quilt with a teal ombre back. I just need to take some better photos of it first!


I love this color combination! It's really gender neutral (but not in a boring yellow or green way), but also really fun!


I used a simple double-stitch every few strips for the quilting.


How fun is this ombre fabric! I wish I could find it in more colors, it makes a great backing fabric. I have several more quilt tops done that I plan on finishing soon, so more to come!


Friday, March 28, 2014

Modern Baby Quilt and A Few Lessons Learned

I've decided this September to do a DIY/Craft fair to sell my quilts. I've been buying lots of fabric and finishing off quilt tops to work towards my goal of having 20 baby quilts (crib-sized) and 5-8 afghan sized quilts to sell at the Ferndale DIY Street Fair.

In the meantime, I also finished a commissioned quilt for a friend to give to her daughter-in-law who is expecting. This might be my favorite quilt yet, and I figured a few things out while working on this quilt!

First the quilt:


I machine-quilted on either side of the stitches to strengthen it, but I also think it makes it look more finished.


One of the things I've struggled with is machine binding. I've followed this tutorial before and just felt like I was fighting and wrangling my quilt the whole time --- it would be pulling and I had a really hard time keeping the stitch straight.

This time I made my binding 3" instead of 2.5" which helped a little. I don't like sewing binding with a 1/4" allowance because I find I'm fighting the feed dogs the whole time - they want to push it over when I try to ride that line. But even with the 3" I was fighting it.

Then I tried something that I hate doing as a sewer... I pinned it. What a difference!!!  I know some quilters that pin every single seam and that's just not my style; I want to get straight to the sewing.  But this is one of those cases where pinning really is essential. I pinned horizontally and ran over the needles while I sewed and it moved through the seam flawlessly. I think it also helped that I pinned in small amounts as I sewed - I stopped every foot or so and pinned the next foot.

This quilt is hands down the "cleanest" quilt I've made yet - the lines are really straight and even. I'm so happy with it!

Here's a couple other baby/crib sized quilt tops I've finished in the last few weeks also:


Monday, January 20, 2014

Naptime quilt made from abandoned Turning Twenty quilt

Recently, my daughter was moved over to the toddler class at daycare and I was informed she needs a blanket for naptime. Since we, like most new parents, were told to never ever put a blanket anywhere near a crib for the first year, we have a strange shortage of baby blankets in the house. Instead of purchasing one, I decided to turn an abandoned quilt into her nap blanket.

Last year I started a Turning Twenty quilt, but mid-way through decided I didn't like anything about it. The colors were too almost-pastel, I had two colors in the mix that were similar and causing problems with the pattern (they kept winding up next to each other), and I just didn't like the quilt. For a nap quilt, though, this might be perfect. It's going to get washed a lot and might get ruined anyways, so it seemed like a perfect use for a scrapped project!

I managed to put this together during one of her naps (which is fitting), so that means it's messy, none of the seams are particularly straight, and the pattern isn't really well balanced. But, hey, it only took a little over an hour! Disclaimer: I already had the turning twenty squares done, so it was just a matter of sewing them together, assembling the quilt sandwich, quilting it with a few (kind of) straight runs of the sewing machine, and sewing on the binding (again, not particularly straight).

Amazingly, I had exactly the right amount of everything I needed. I had just enough batting left from another project and the exact right length of satin blanket binding.  I normally wouldn't use satin binding for a quilt, but I kind of like it for this purpose.

So, without further ado, here is the fastest quilt I've made to date:


Wednesday, July 3, 2013

Joovy Stroller Pocket Area Reinvented


I was reading a book recently that argued that necessity was not the mother of invention, but instead that irritation was why we invent and re-invent useful things. And with that, I give you today's project: a re-invented Joovy Scooter Stroller pocket area (I don't know what this is actually called).

Here's a picture of what it originally looked like, except mine is green:
A Joovy Scooter pretending to be all useful and holding a bottle.

Overall, I really like this stroller, but that back area has been extremely irritating for several reasons. One, my Camelbak water bottle doesn't fit in the cup holder. This is the big one, because when I'm out running around all day with baby+stroller, I need water! Two, because of the design of the handlebars (which are comfortable to use), there's no was to attach a pre-bought stroller organizer to add more space:
Stroller organizer does NOT fit on a Joovy because of the handlebar design. 

And three, I just generally needed more room to store stuff that I wanted quick access to.  So, after much irritation over the course of the last year, I came up with a solution:


I made a trip to Joann's and bought outdoor fabric (like the stuff you use to make outdoor chair cushions), grey strapping, a pack of 4 D Rings, and some carabiners. 

With that, I made some straps for clipping things to. I'm not sure what they are called, but I've seen them on backpacks:


And, a cup holder that actually fits my water bottle:

It looks a little funky while empty, but there's webbing on the bottom, and it's reinforced with boning (the stuff for corsets- that's right I used it for something actually useful!) to stay open for the water bottle.

Think I'll take Sylvie to the zoo to test it out :-)


Friday, May 17, 2013

Wonder Woman Tutu

My friend's son will be having a super hero themed costume birthday party next month. Even though my daughter is too young to really enjoy dress up (she'll be 11 months), I decided she needed a kick ass super hero costume. There aren't a whole lot of choices for a) babies and b) girls in the super-hero-costume category, but I did find a pretty cool wonder woman onesie at superherostuff.com. I realize I could have gotten her a boy's costume, but the feminist came out in me and I was determined to find a kick ass female super hero for Sylvie to dress up as, because, well, girl power!

Wonder Woman Onesie!


Since there was not a bottom to wear, and while Wonder Woman may have run around in the equivalent of a bathing suit, I would like Sylvie to be a little more dressed in public. Then, today while at Joann's buying more quilting fabric, I got into a conversation with a very nice woman working at the cutting counter who explained to me that I could make a tutu simply by cutting up tulle and tying it onto a elastic crocheted headband!  And - Sylvie's Spectacular Super Woman Super  Hero costume was born!


 Since Sylvie is only 11 months old, I used two yards of tulle, one yard medium blue, one dark blue, and a red headband. The headband was $1.50 and the fabric was $3.25 - how amazing and cheap is that!
Basic directions:

  1. Cut up the tulle into strips (about 7ish inches wide, and maybe 2 feet long - I didn't measure any of this so this is a guess). 
  2. Put the elastic headband around something (like a book, or 2-liter pop bottle) so that you can easily work with it.
  3. Then, fold the tulle in half and pull a little bit of the folded side through the elastic, so that there is a little loop of fabric. 
  4. Then, pull the rest of the fabric through the loop and pull tight.


Edit:  Here's the final result with the costume!


Tuesday, May 7, 2013

Quilting Frenzy!


Since I've been on a roll lately, I decided to finish up the quilt I'd planned on making for my mom. Then, I remembered I had a whole bunch of jelly rolls laying around and decided to do another one for me. I'm going to probably need to stop for awhile after this!!


Quilt for my mom


Quilt for me!


Friday, May 3, 2013

A Birthday Present "Value" Quilt


Since the semester is over and papers are all graded and in the system, I finally had enough time to finish the "birthday" quilt for my sister (her birthday is in March, so we'll call it the belated quilt). I got the fabric for this quilt in January and it's just been sitting around screaming at me to work on it for the past four months.

Finished quilt!

For this quilt, I used the Mediterranean Dream fabric by Simon and Kabuki, which I chose based on a color palette she sent me when I asked if she'd like a quilt. I thought I was never going to find anything like what she was looking for, and then this fabric pack came along.

Palette my sister sent me

Fabric I found!

I think I did pretty good hunting down that palette!  So far, I've only made patchwork quilts, so I wanted to try something new, but not so difficult that I would mess it up. I stumbled on "value quilts" in my googling, and decided to give that a try.  SewKatieDid has a great tutorial, if you are interested in making a value quilt. This is the end result:


So excited to be done, now I can start my next one!